
|
| How to Virus Scan Azure Blob Storage Uploads in Power Automate |
| 3/6/2024 - Brian O'Neill |
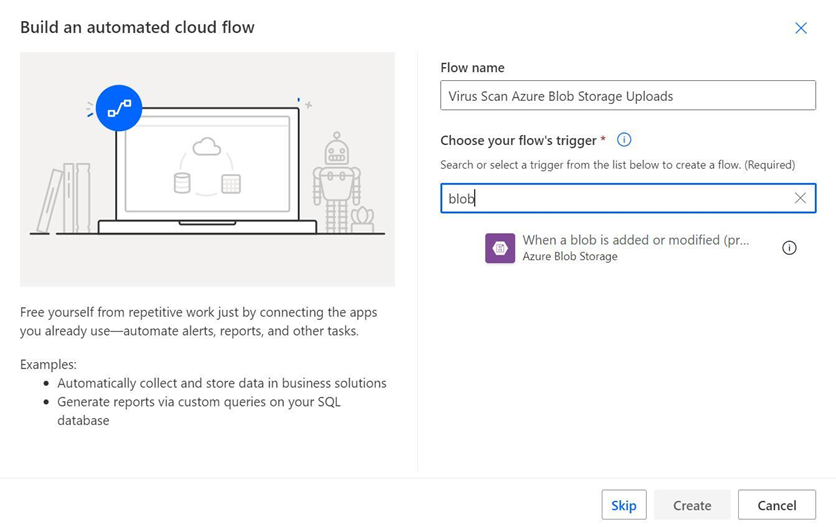
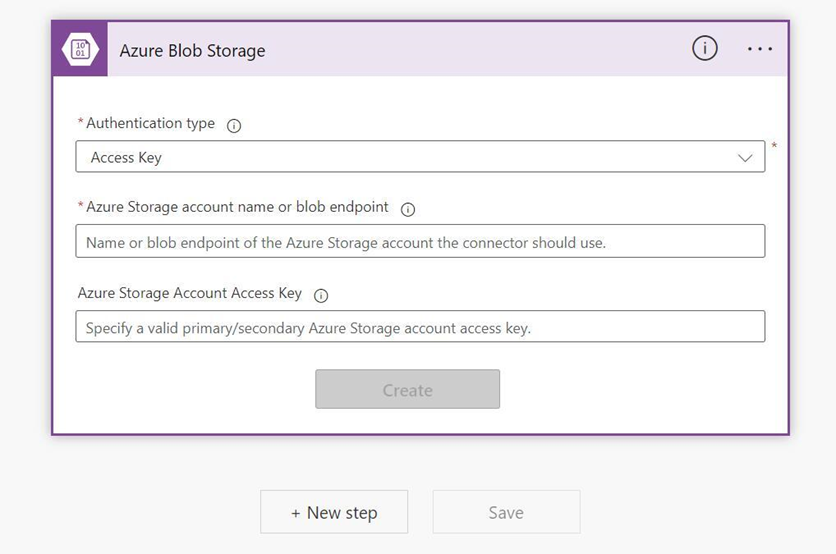
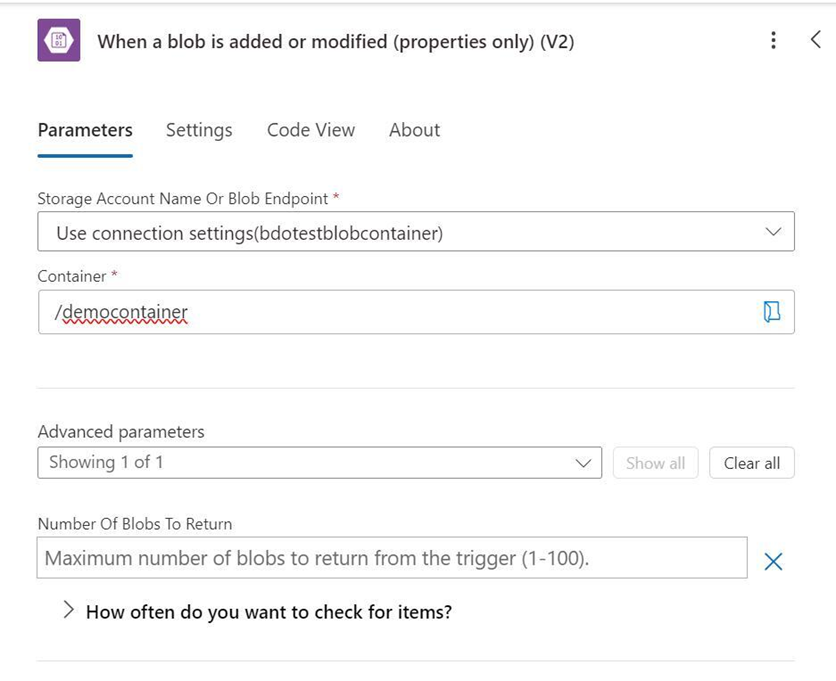
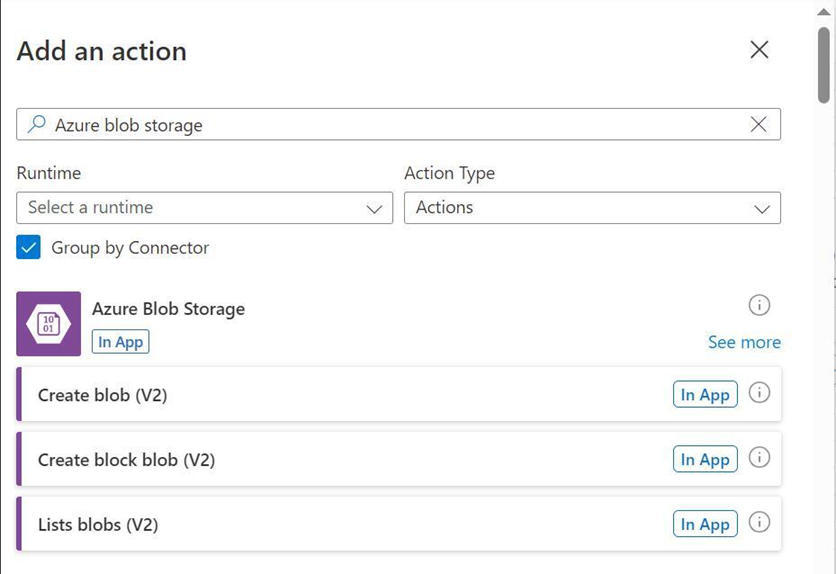
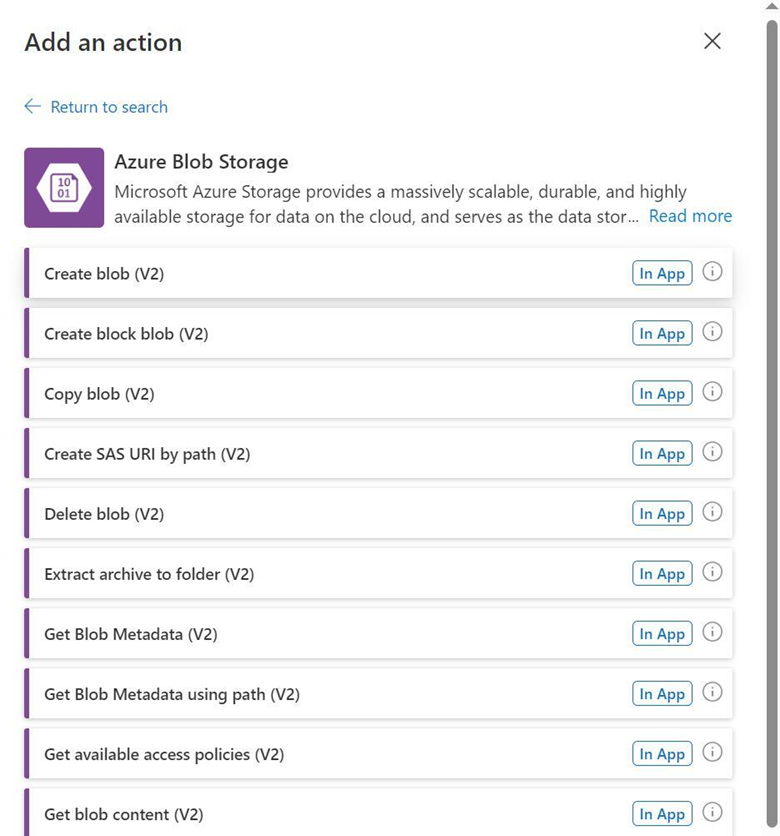
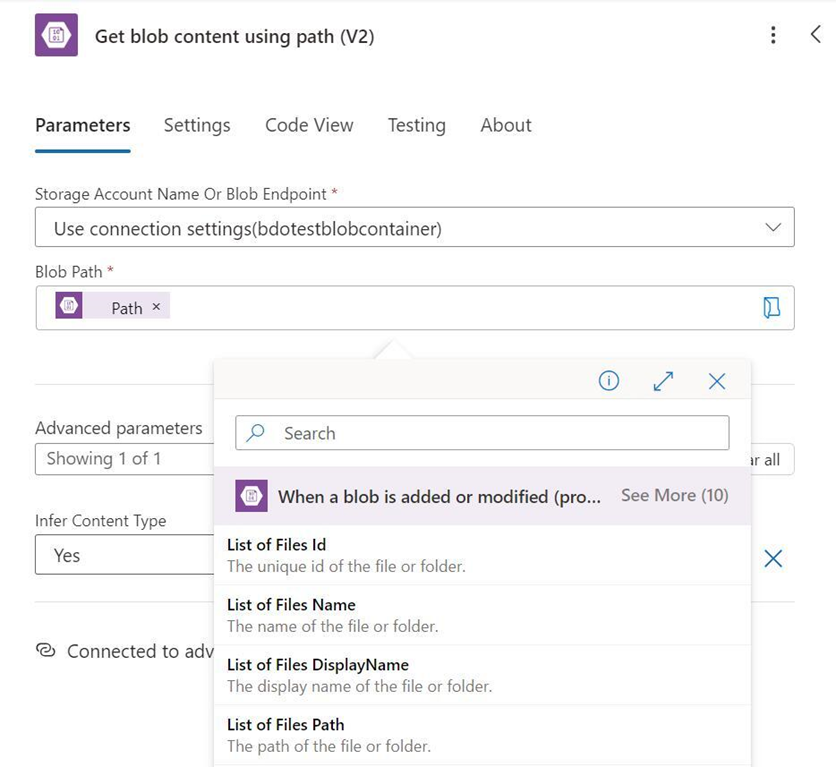
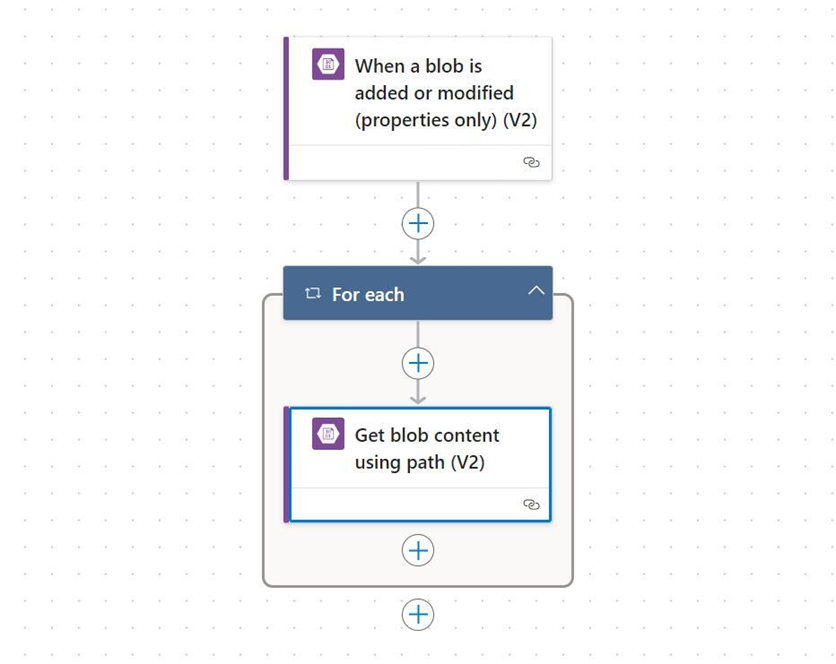
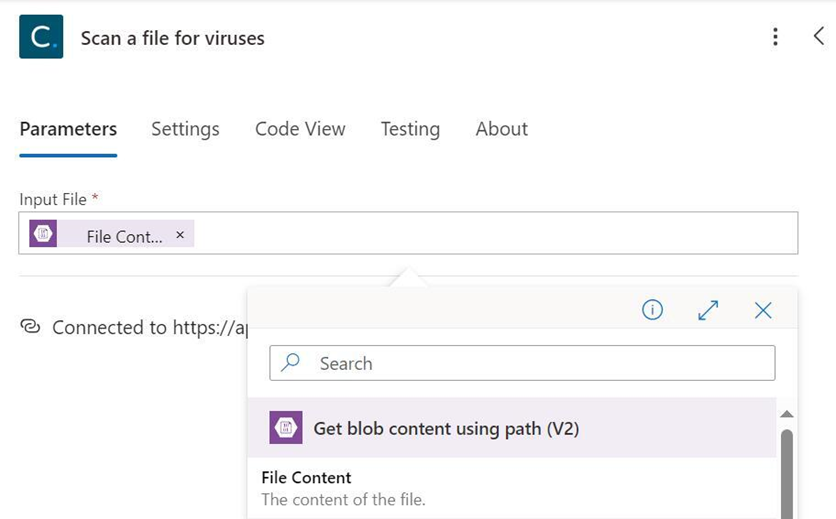
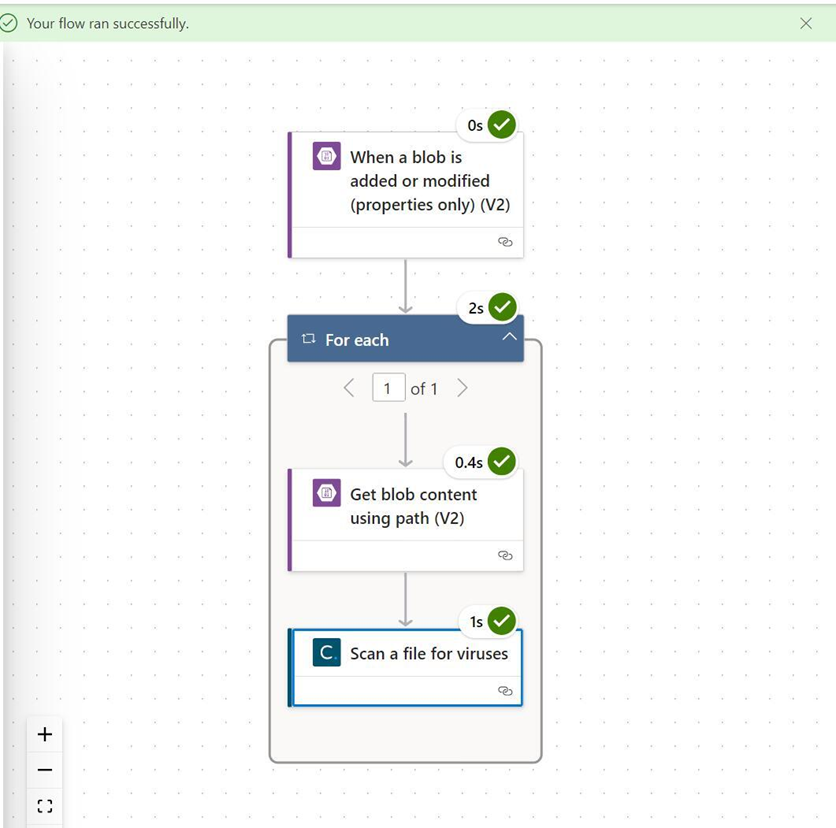
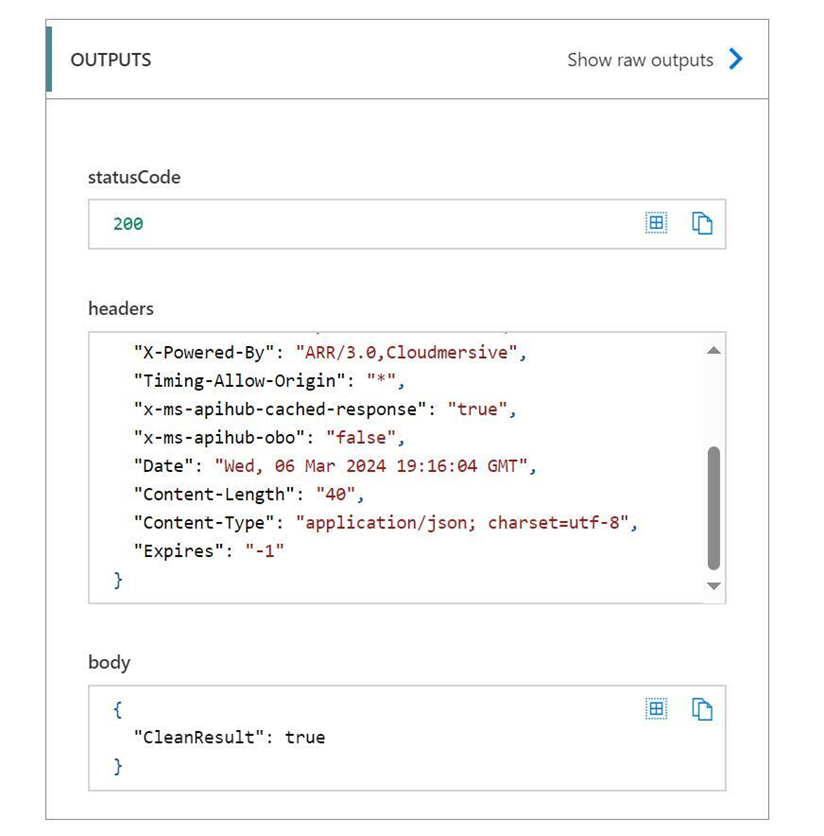
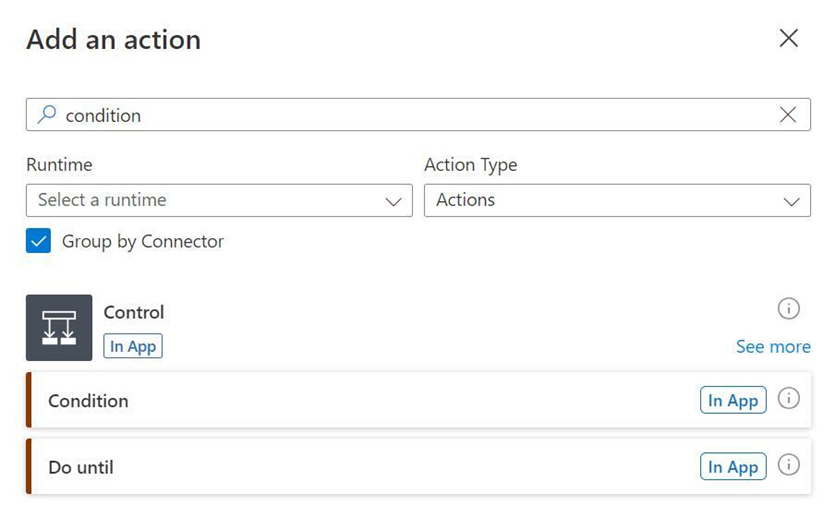
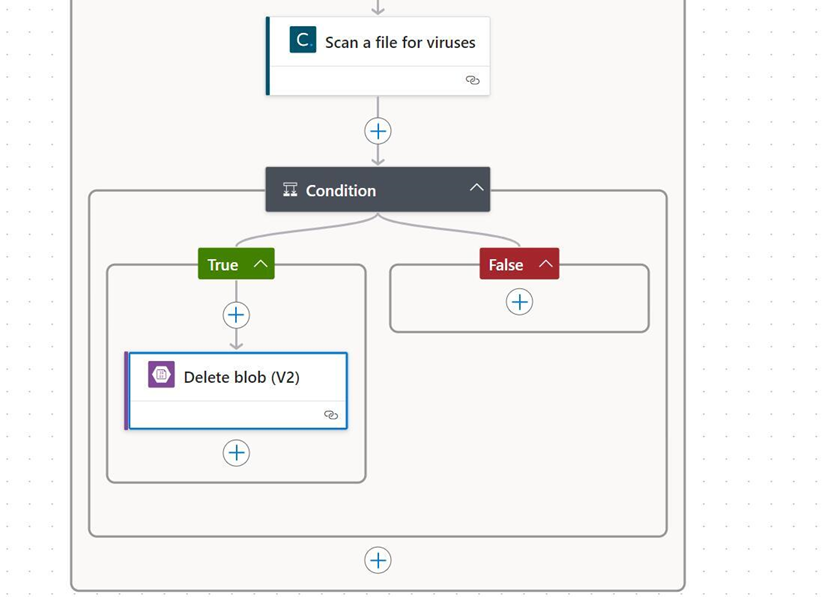
In Power Automate, we have the convenient option to call the Cloudmersive Virus Scan API connector in a simple cloud flow. Below, we’ll set up an example automated flow in Power Automate that scans Azure Blob Storage uploads to a specific blob container in our Azure Storage account. Please note – a premium Power Automate subscription is required to utilize Cloudmersive connectors. Let’s start off on the Power Automate home page. From here, let’s select Create on the lefthand side of the page to bring up our flow type options. We’re going to create a flow that automatically triggers when a new file is added to our Azure Blob Storage Container, so let’s select the automated cloud flow option. In the build an automated cloud flow window, let’s give our flow a relevant name (i.e., Virus Scan Azure Blob Stroage Uploads), and then let’s type “blob” into the Chose your flow’s trigger search bar. This brings up the When a blob is added or modified (properties only) (V2) trigger, which is the only trigger action available in the Azure Blob Storage connector. Let’s select this option and click Create to start designing our flow. On the flow diagram page, we’ll first need to configure our Azure Blob Storage connection before we can configure our request parameters. In this example, we’ve selected “Access Key” from the Authentication type dropdown (our other options include “Service principal authentication” and “Microsoft Entra ID Integrated”). This way, we’ll just need to provide our Azure Storage account name or blob endpoint along with our Azure Storage Account Access key. We can find our Access key information in the Security + networking section of our Azure Blob Storage account page. Once we’ve created our connection, we can open our trigger parameters tab and select the Storage Account Name or Blob Endpoint we’re targeting in our scan. Below that, we can select our target Container by following our Azure Blob Storage folder path. If we click Show all next to the Advanced parameters dropdown, we’ll have the option to specify the number of blobs we want to return in our trigger. This option (along with the dropdown menu below it which provides the option to specify trigger intervals) is primarily advantageous for storage containers which deal with a large number of files, so we’ll be leaving it blank in this example workflow. With our trigger step successfully configured, our flow is now going to retrieve properties from new blobs as they enter our target Azure Blob Storage container. The Cloudmersive Virus Scan Connector requires file content to perform a scan, so we’ll need our next action to retrieve blob contents using blob properties. Let’s click on the Add an action button below our flow trigger and type “Azure Blob Storage” into the search bar. This brings up the Azure Blob Storage connector, and we can click See more to enumerate a list of connector actions. We’re looking for the action called Get blob content using path (V2), which we can find towards the middle-bottom of this list. Let’s click on it and begin configuring the request parameters. Just like we did in our trigger step, we’ll first need to select our Storage Account Name or Blob Endpoint from the initial dropdown. Below that, in the Blob Path parameter, let’s select dynamic content from our trigger step labeled List of Files Path, and then let’s leave the Infer Content Type dropdown on “Yes”. We’ll notice that selecting the List of Files Path content wrapped our Get blob content using path (V2) action in a For each control to account for the possibility that multiple files were uploaded to our target Azure Storage Container. Within the For each control, let’s click on the Add an action button and search for the Cloudmersive Virus Scan connector. From the actions we see available under the Cloudmersive Virus Scan connector, we can click on the Scan a file for viruses action. If we haven’t used this connector before, we’ll need to name our connection and enter our API key in the ensuing connector configuration step. Once we do so, we’ll be able to configure our Virus Scan request parameters. Within the Input File parameter, let’s select dynamic content labeled File Content from our Get blob content using path (V2) step. When we save and test this flow (by uploading a new file to our Azure Blob Storage container), the content retrieved from each new blob item path will now undergo a rigorous virus & malware scan. Because we performed a basic scan with the Cloudmersive Virus Scan API, our flow output will contain a “CleanResult” response which can either be True or False. This example flow was tested with a clean Excel XLSX file upload, resulting in a “CleanResult”: true response. Depending on the security limitations in our environment, we can trigger “CleanResult”: false responses using EICAR files from the EICAR website. We can use the “CleanResult” Boolean response to take various actions as a next step in our flow. We could, for example, ask Azure to delete the file immediately in the event of a “CleanResult”: false response, and to do nothing in the event of a true response. To create this condition, we would first need to add a new action within our For each control and search for the Condition control. When configuring our condition, we could set dynamic content labeled body/CleanResult from our Scan a file for viruses step equal to “false”. Then, within the True outcome of our condition (meaning a “CleanResult”: false response did occur), we could add an action to delete the blob from our Azure Blob Storage container. This action can be found in the Azure Blob Storage connector actions list, and it can be configured by once again selecting our Storage Account Name or Blob Endpoint from a dropdown before filling the Blob parameter with dynamic content labeled List of Files Path from our trigger step. Now we have a simple, automated flow running in the background that scans and deletes virus- or malware-infected blobs from an Azure Blob Storage container. For more information on the Cloudmersive Virus Scan API, please do not hesitate to reach out to a member of our sales team. |
Sign Up Now or 

 Blog
Blog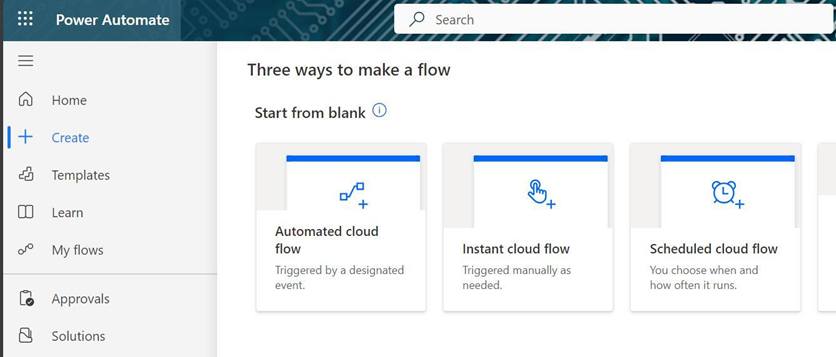


 Virus Scan APIs
 Content Disarm and Reconstruction APIs
 Spam Detection APIs
 Document Conversion & Processing APIs
 Document AI APIs
 Natural Language Processing (NLP) APIs
 Optical Character Recognition (OCR) APIs
 Image and Face Recognition and Processing APIs